
20 Minute Labs: Light Tricks

IMPRESS YOUR FRIENDS WITH THESE SCIENCE PARTY TRICKS!

Ever heard of a party trick?
A party trick usually involves something you can do quickly and easily to impress your friends at a gathering and leave them dying to know how you did it!
In this month's 20 Minute Lab, we'll show you how you can use science to do some cool party tricks using light refraction.
You'll turn images around in water - seemingly by magic! Your friends won't believe it 'til they see it!
WHAT YOU'LL NEED
-
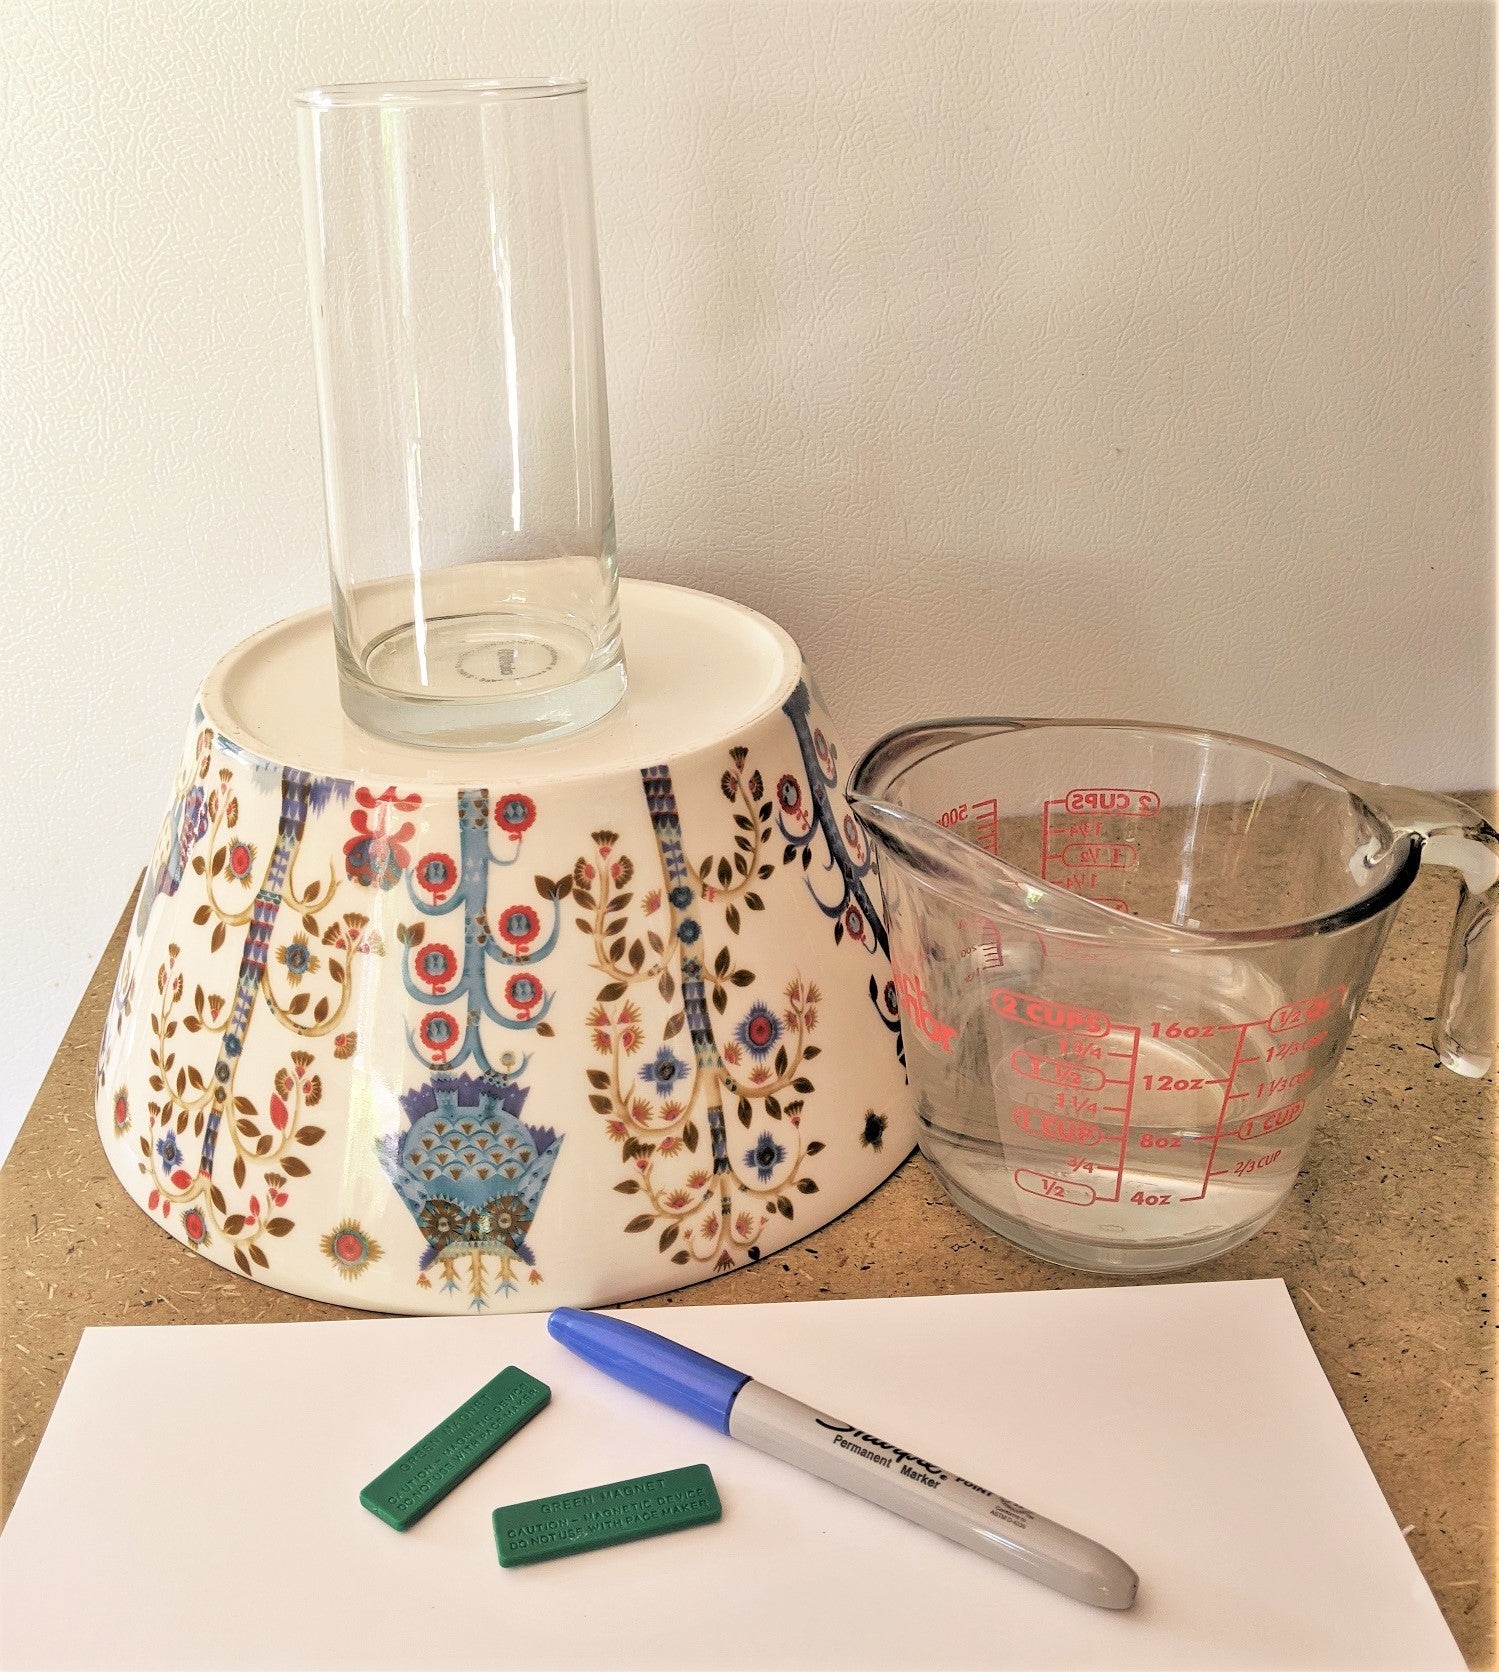 One piece of white paper
 - Colored marker
- Clear, round glass
- Measuring cup (or anything with a pour spout)
- Water
- Tape (or magnets if using the fridge or other metallic backing)
- Something to elevate the glass to eye level, like a table, counter, and/or bowl
 One piece of white paper
LET'S GET STARTED!
-
 Cut the paper into three small sections, about 3" x 3".
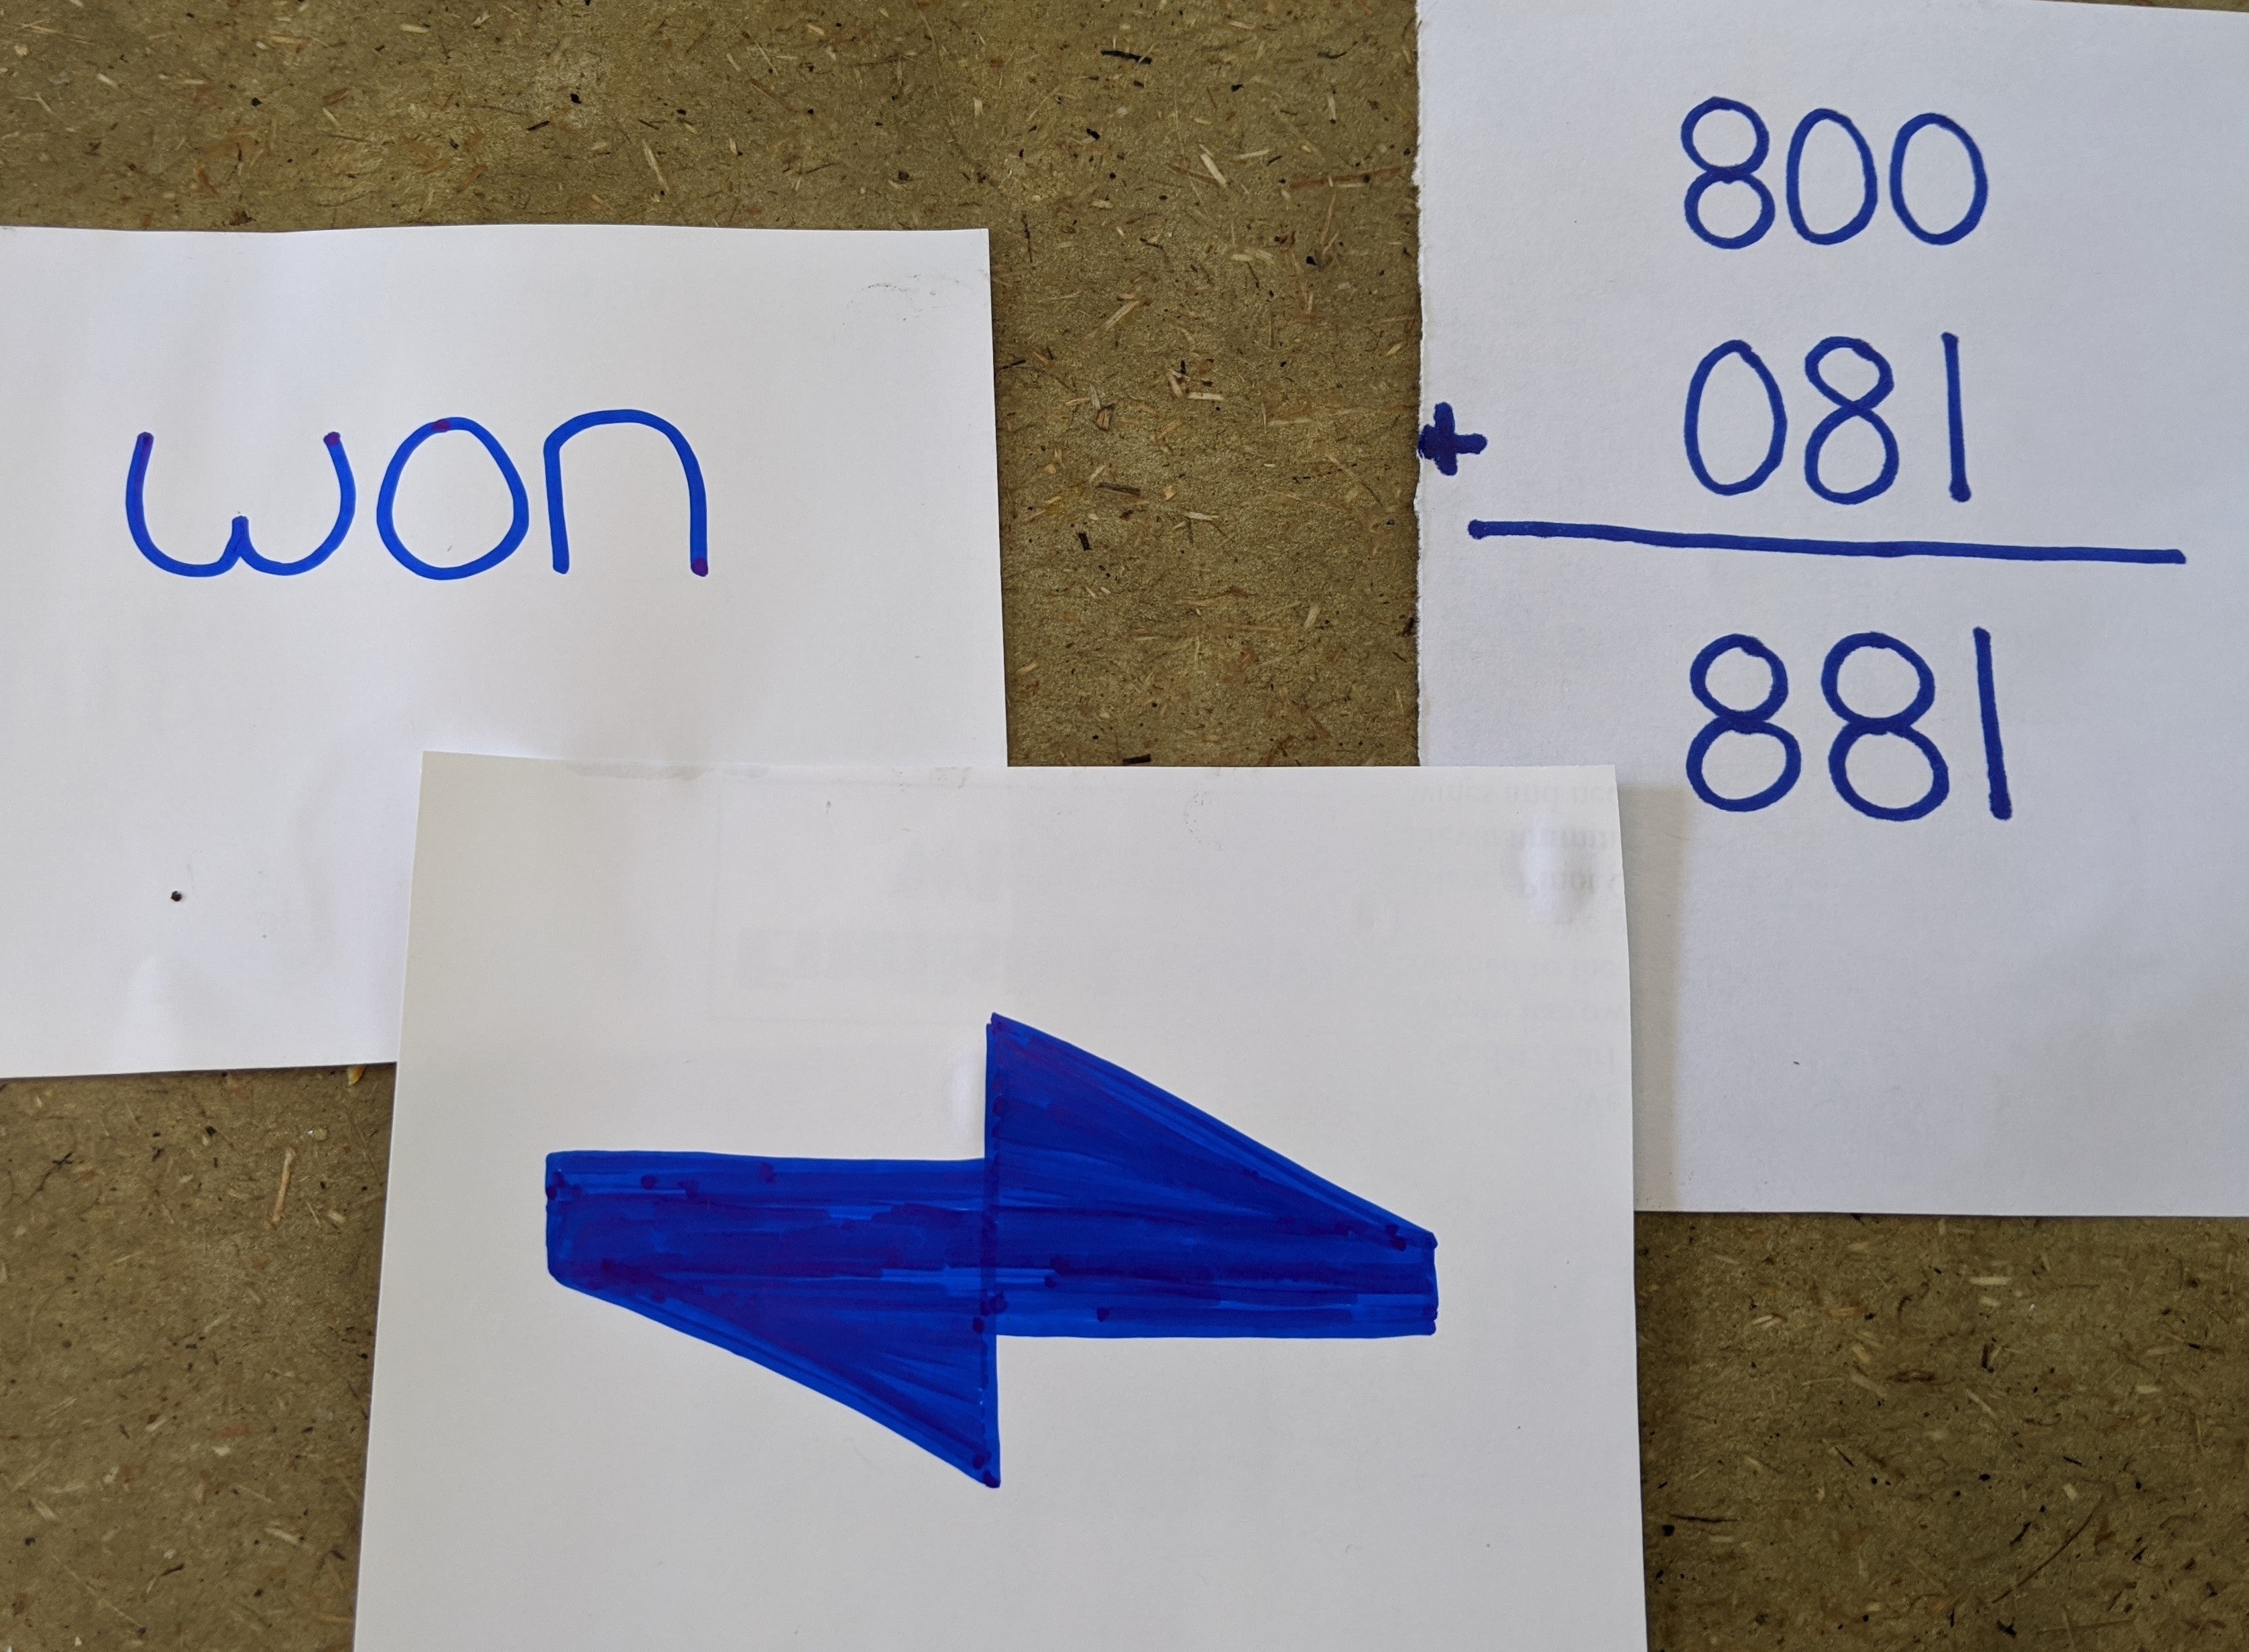
 - On one section of your paper, draw a double arrow pattern - top half of arrow in one direction, with the bottom half reversed (see image!)
- On another section, write this equation:
800
+ 081
881 - On the last section, write the word 'won'.
-
 Attache one of the drawings to a wall or fridge using your tape or magnets. Make sure it is at eye level height.
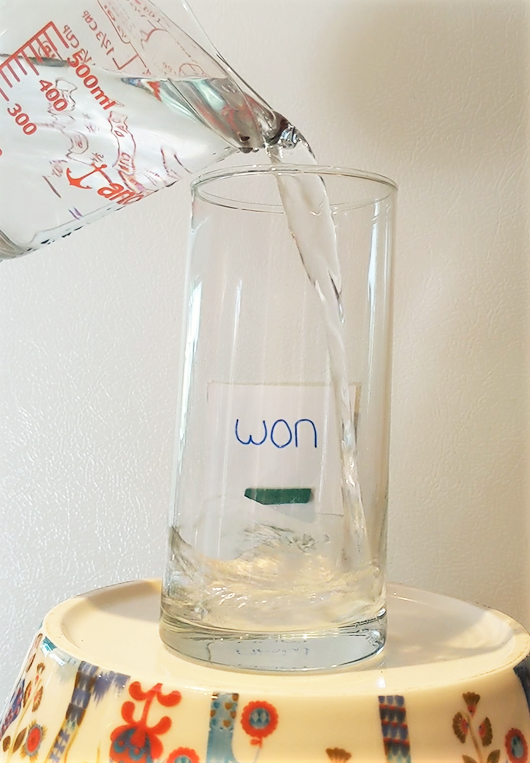
 - Place the empty glass in front of the paper, at the same height, but about a foot in front. Use your table or bowl as needed to prop up the glass to the correct height.
- While looking through the glass at eye level, pour the water to the top of the glass (or until it reaches the halfway point in the case of the arrow)
- Watch the "magic"! (We know it's science 😜!)
 Cut the paper into three small sections, about 3" x 3".
 Attache one of the drawings to a wall or fridge using your tape or magnets. Make sure it is at eye level height.
Troubleshooting
You should have seen the image flip. If you image did not flip, you may not have placed the glass far enough away from the paper. There should be about 6" to a foot of space in between. There needs to be space for the full reverse effect of refraction! See below:
WHAT'S GOING ON?
Why did your images seem to flip? It all has to do with refraction, which is the bending of light when it goes through a new material. In this set-up, the light moves through many different materials. First the light moves through the air, then the front of the glass, then water, then the back of the glass, then through air again, before finally reaching your drawing! Whew!
Here's an illustration of what's happening: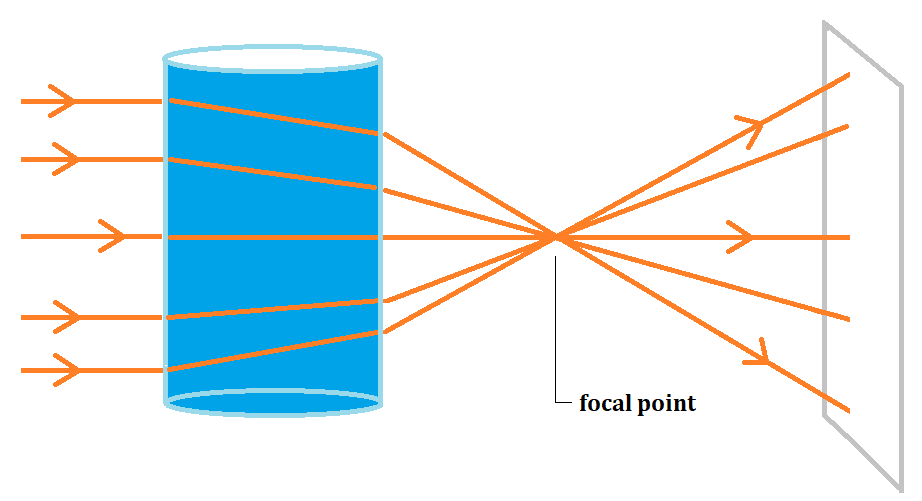 Light entering the top of the glass bends downwards a bit. Likewise, light entering into the bottom of the glass bends upwards a bit.
Behind the glass, the downward and upward light rays meet at a focal point, then continue on their way, finally reaching your drawing. When you look through the glass, this bending of light makes it look like your drawing has reversed!
Can you think of other fun drawings to try? Try them and let us know what happens!
SHARE WITH US!
Let us know how your experiments turned out! Share your photos and results with us on Facebook, Twitter, Instagram, or send us an email to info@yellow-scope.com. We love getting your messages!
For more exciting experiments, check out our Yellow Scope science kits on the Shop tab of our website!


Chelsea Schuyler
Author