
20 Minute Labs: Rainbow Slime

MAKE SOME STRETCHABLE, RAINBOW SLIME!

Love slime? Love rainbows? Do we have the lab for you!
For the experiment today, we'll use an artistic technique called pointillism.
Typically when you are drawing or painting, you use lines to create images and patterns. But with pointillism, you use many, many dots to create patterns and pictures. Up close, images created with this technique might not look like much, but when viewed from farther away it can make a beautiful picture!
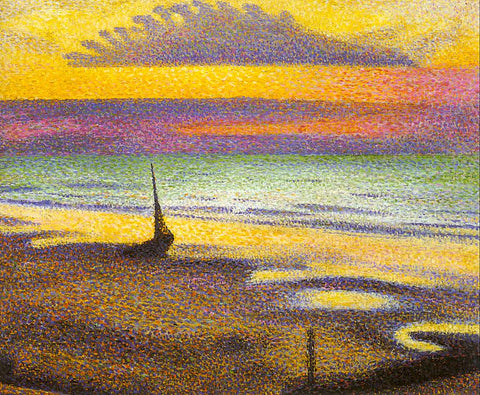 This way of making art first got its start in the 1800s. You may have heard of some famous artists, including Seurat, who had a big influence on pointillism. Other artists like like Monet and Van Gogh also used aspects of pointillism in their work!
In this month's 20 Minute Lab, you'll use pointillism to create vibrant pictures. What's more, you'll do this right on some homemade slime! Stretchable art?! How cool!
(Can't get enough slime? Try our other recipes in our 6 Recipes for Making Slime blog!)
WHAT YOU'LL NEED
-
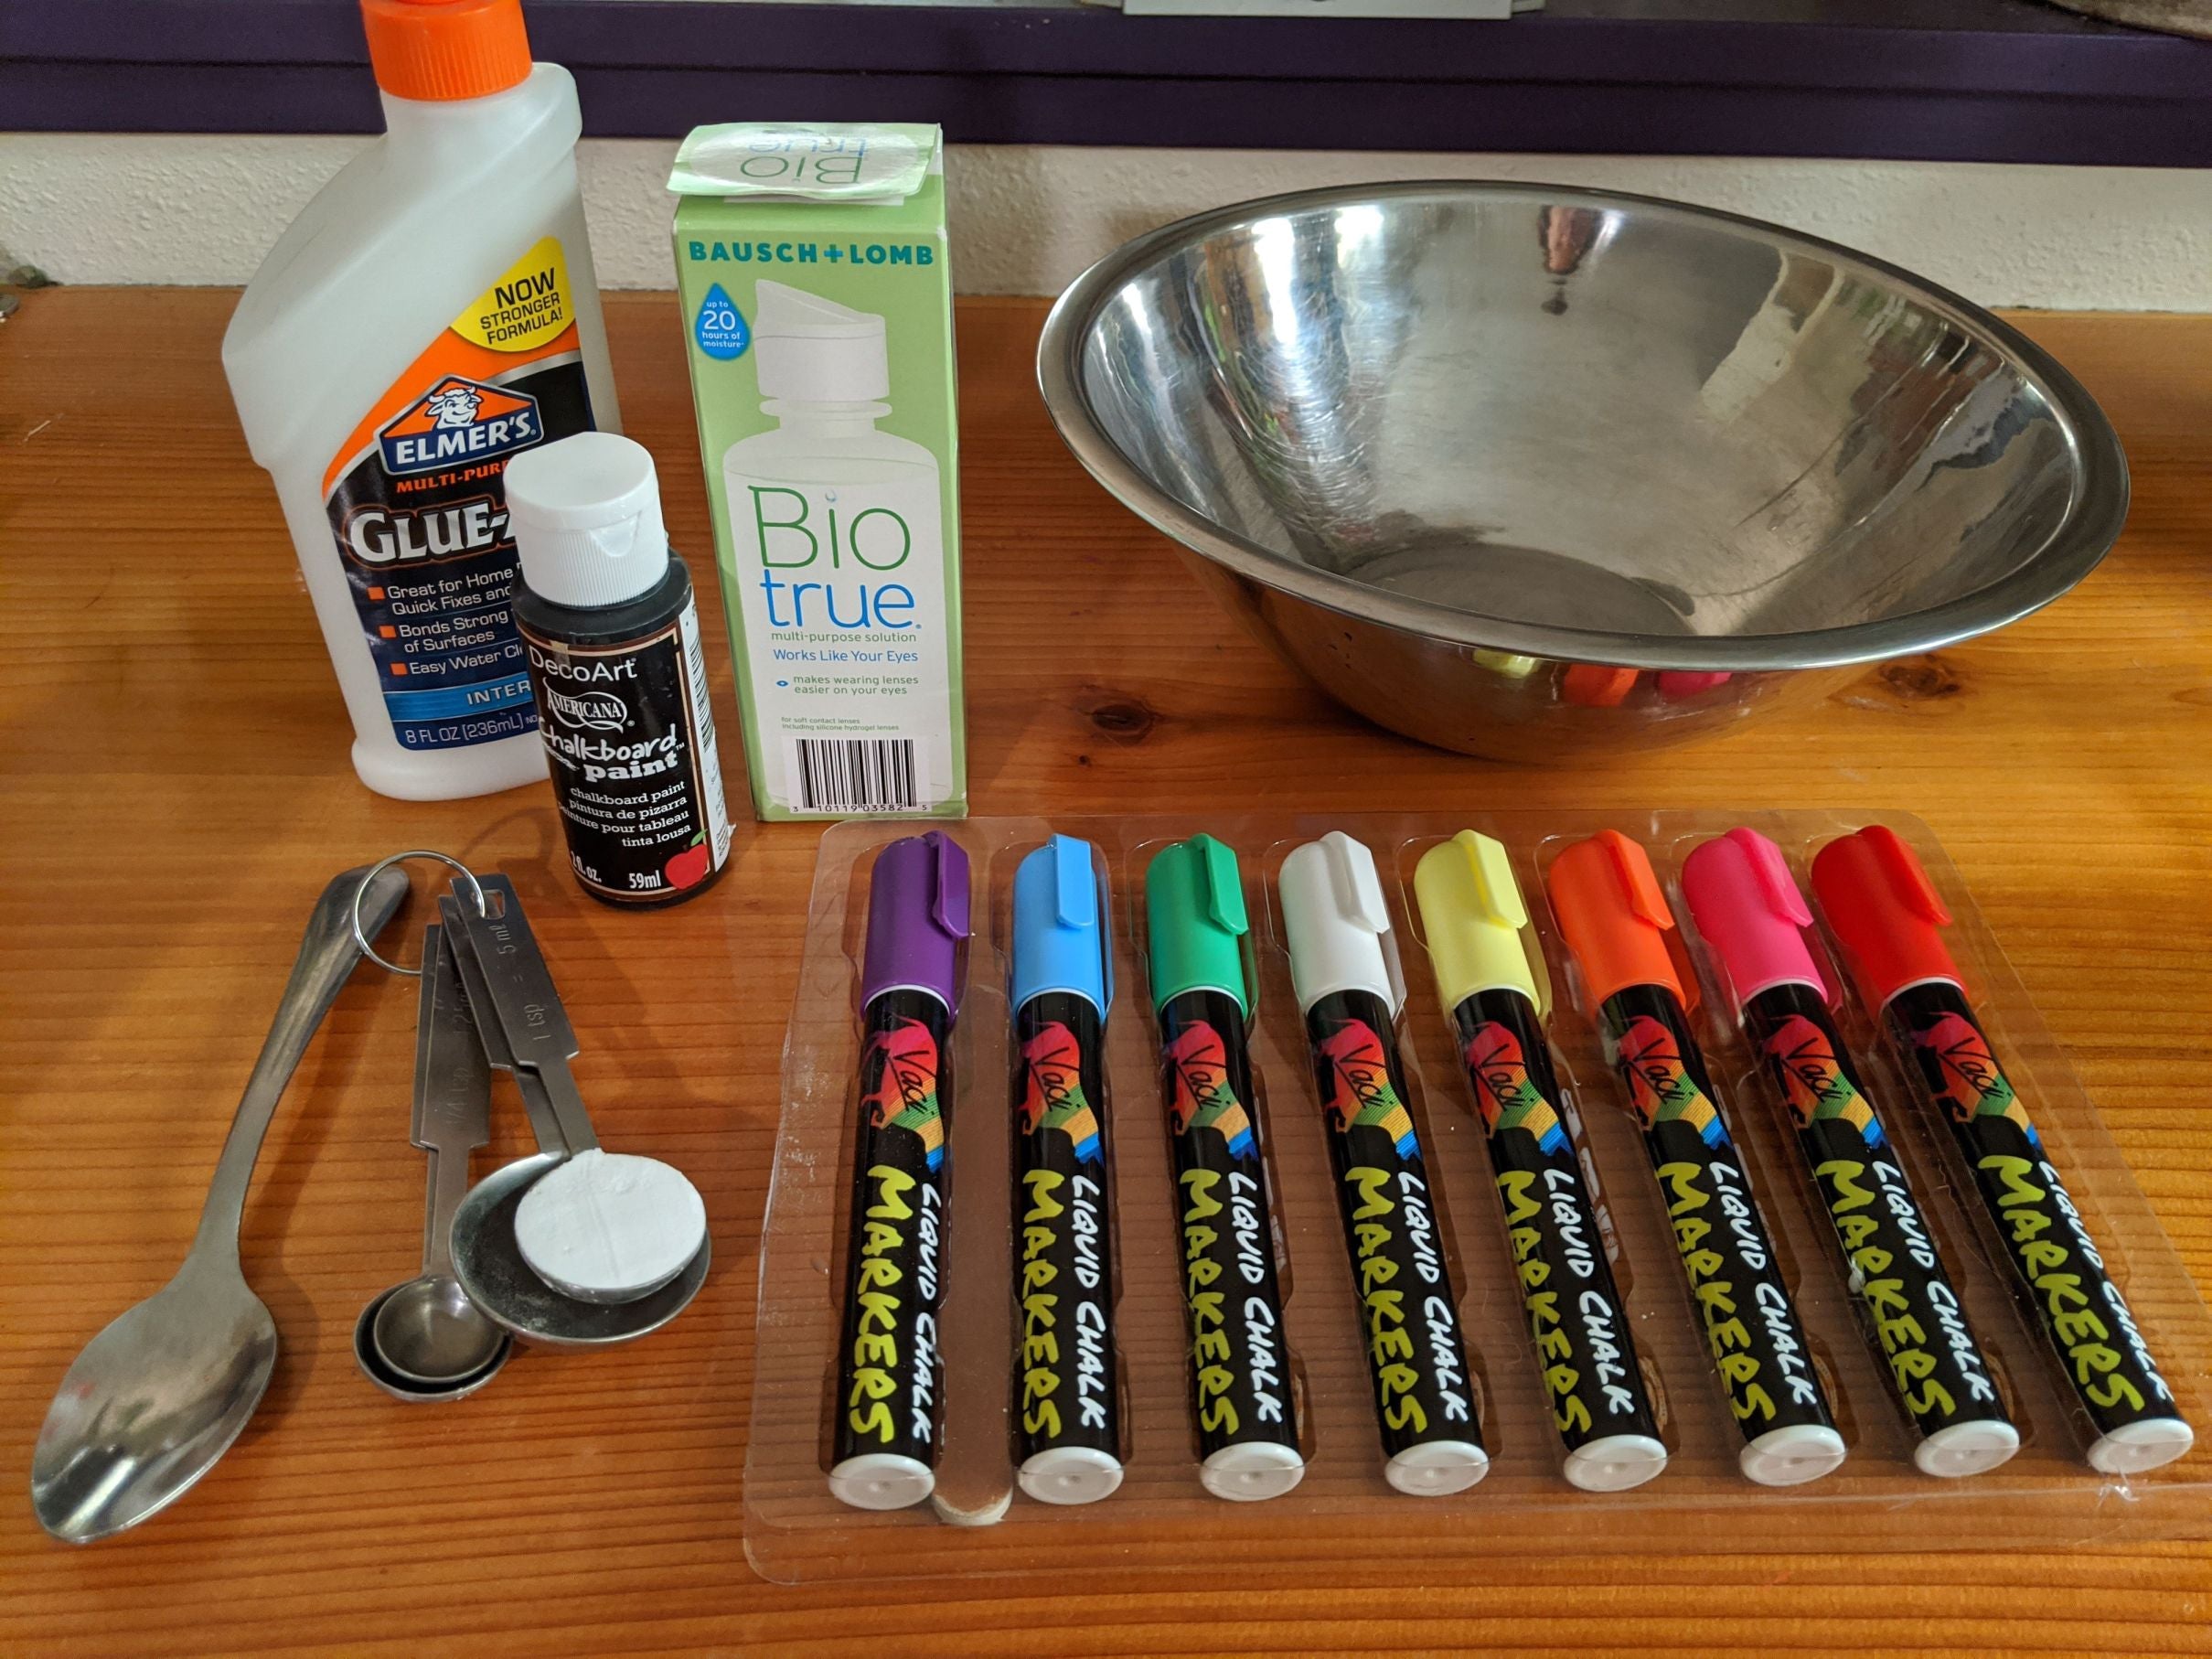 mixing bowl
 - strong spoon or fork (not plastic)
- 1/2 cup white glue (Elmer's is fine!)
- 2 Tbs black chalkboard paint
- 1 tsp baking soda
- 1 tsp (and a bit more) contact lens solution (make sure it contains boric acid)
- chalk markers
 mixing bowl
-
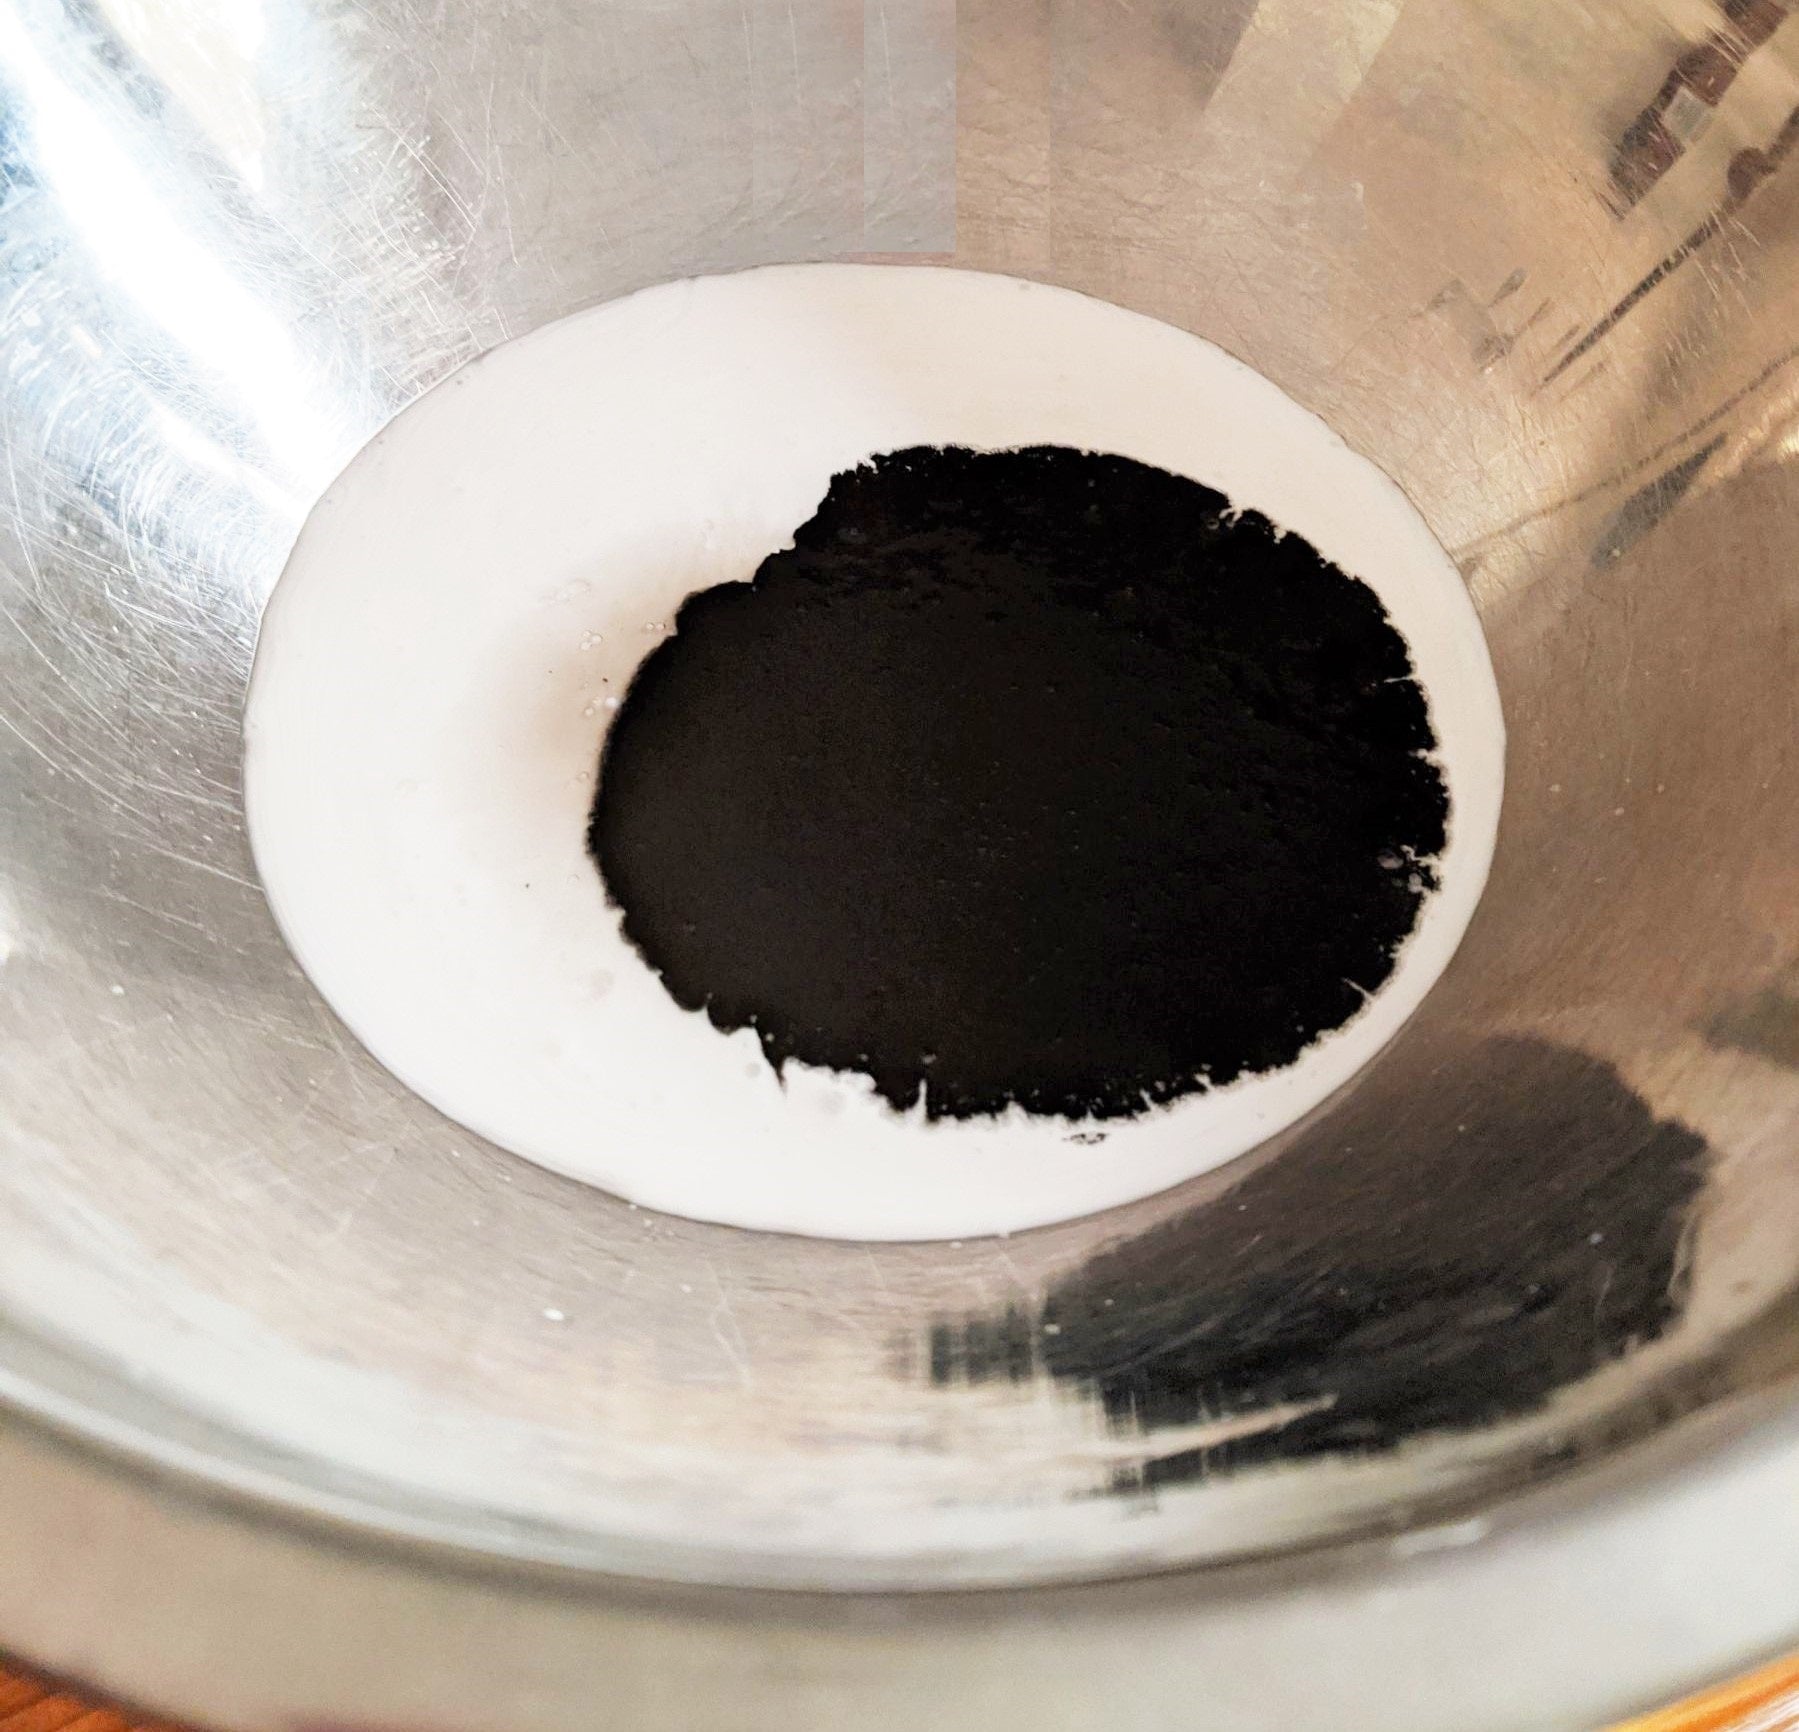 Measure the glue and add to the mixing bowl.
 - Add the chalkboard paint to the glue and mix together with the spoon.
- Add the baking soda and mix again.
- Now, add just 1 teaspoon contact lens solution and mix. You can switch from using your spoon to using your hands now, kneading the slime to combine all the ingredients.
- If the slime is still sticky, add a bit more contact lens solution - one or two drops at a time. It should no longer feel as slippery on the outside, nor should it stick to the sides of the bowl or your hands.
 Measure the glue and add to the mixing bowl.
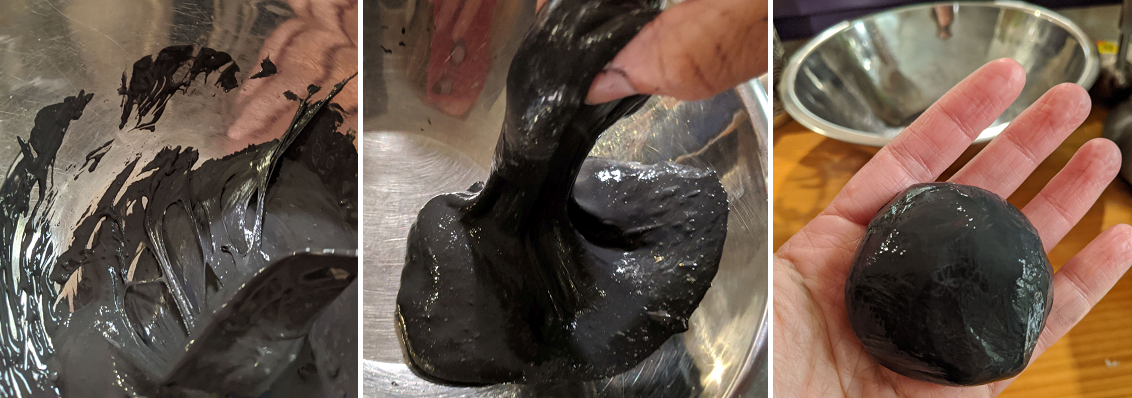
6. Now, lay out your black slime on any surface, in any shape. Wait for it to settle a bit (flatten out).
7. Use the colored chalk markers to add dots (not lines) of color to the slime. (If your markers are brand new, follow the instructions for getting them started first, before using them in this experiment.)
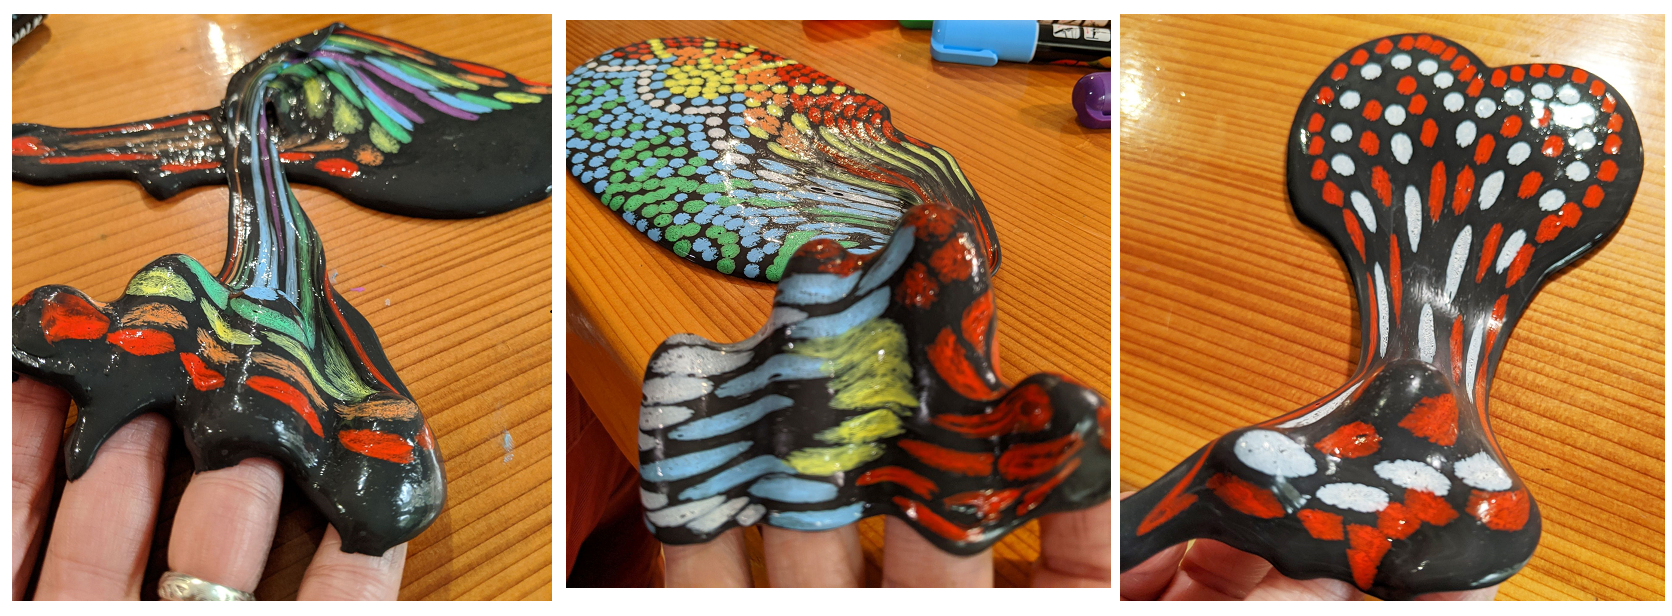
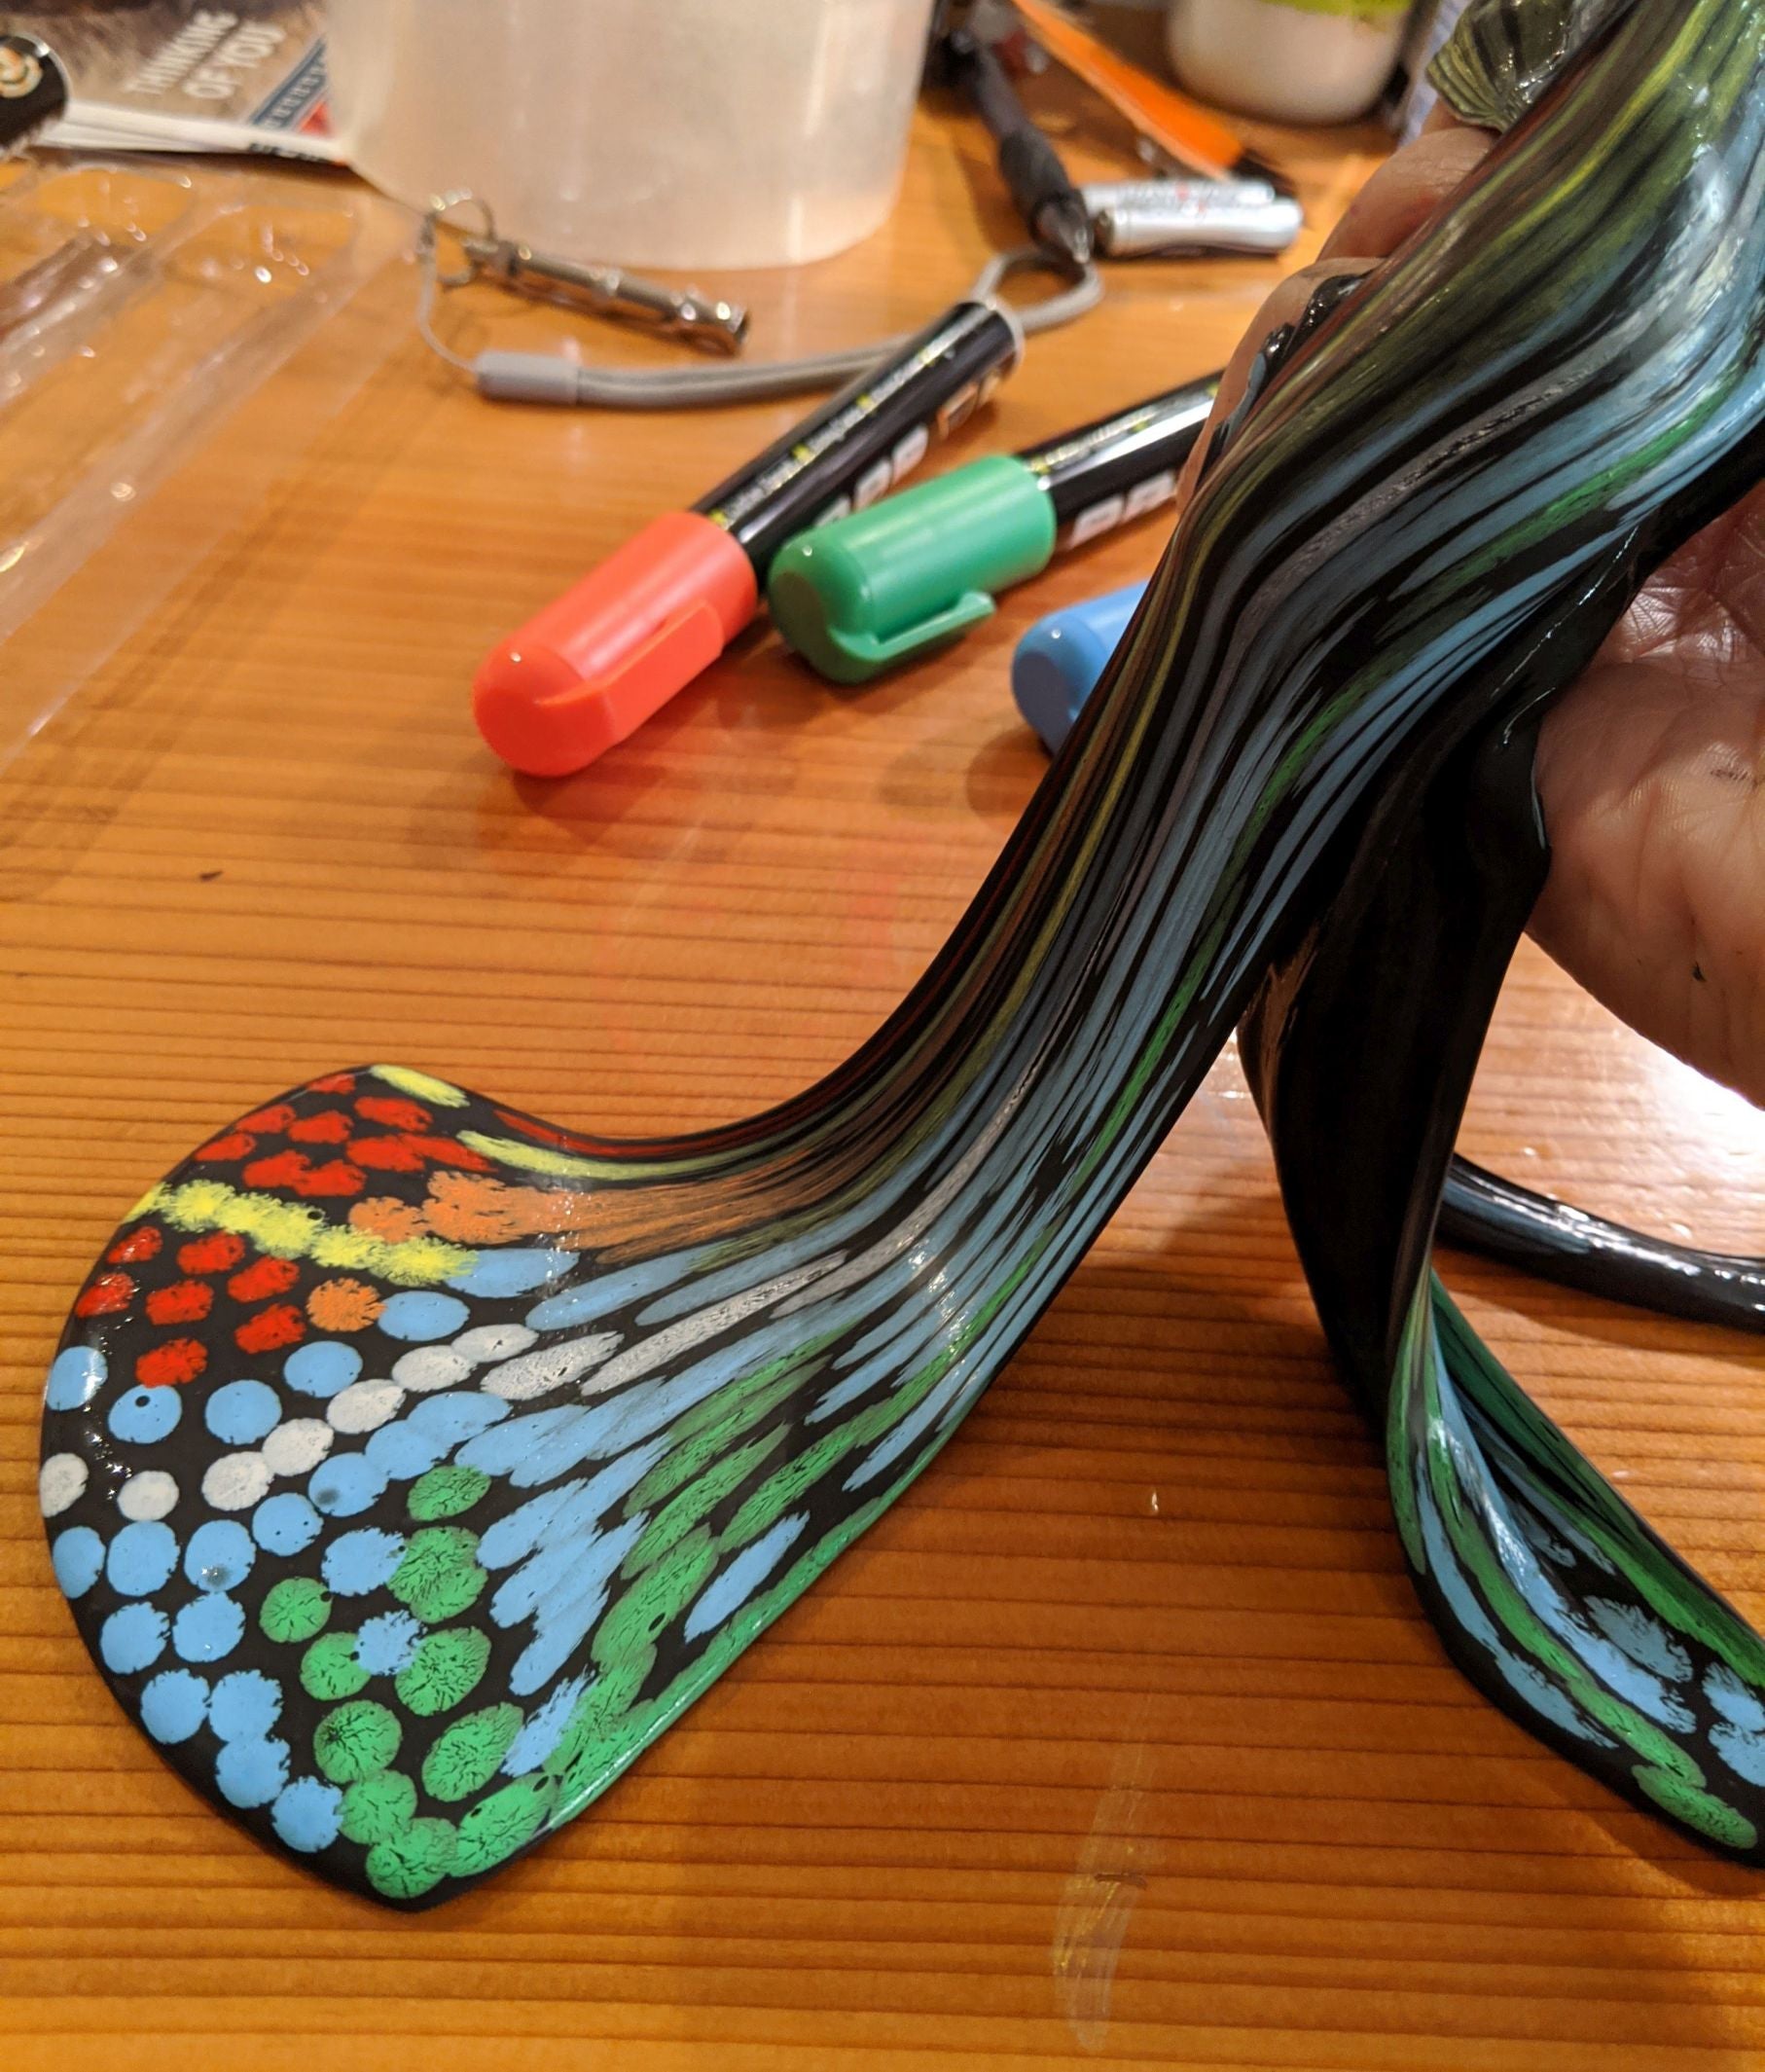
8. Pull on the sides of your slime to see the colors stretch and distort!
9. Want to make another picture? Simply squish and knead your slime to absorb the colors and start over! 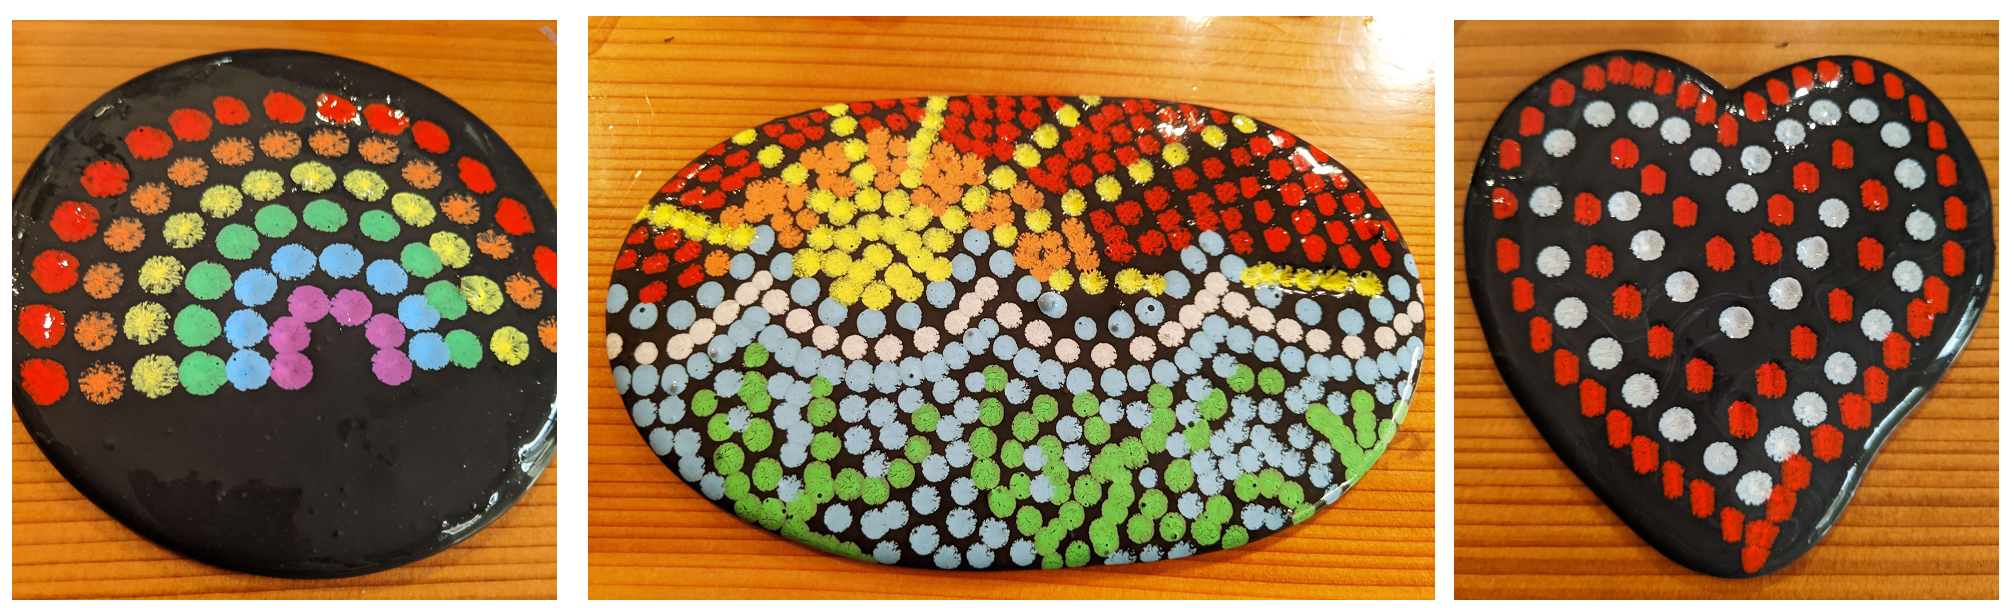
WHAT'S GOING ON?
 How is it that you can turn sticky, gooey glue into a slime? Well, glue is a polymer, which is a type of molecular structure that is a chain of repeated units - like beads on a necklace. ('Poly' means 'many', so 'polymer' means 'many' units.)
Picture the glue being full of these little units, like a bunch of small sticks in a bucket of water. The sticks flow over and under each other.
 The contact lens solution you added contains boric acid. The borate ions linked up with the glue, thickening the polymer - kind of like if you started tying the sticks together. They still flow, but not as well. This made the glue solution stiffer, allowing it to stretch out, but preventing it from spilling off the sides of the table!
When you added the color from the chalk markers and then stretched your slime, you distorted the image. Distortion is also a technique used in art. Congratulations! You used pointillism and distortion in your slime - what an artistic scientist you are!
SHARE WITH US!
Let us know how your experiments turned out! Share your photos and results with us on Facebook, Twitter, Instagram, or send us an email to info@yellow-scope.com. We love getting your messages!
For more exciting experiments, check out our Yellow Scope science kits on the Shop tab of our website!


Chelsea Schuyler
Author